
Timesheet Mobile's leading geofence based timekeeping solution now makes it even easier to track travel times for Workers moving between geofence job sites. Stand-alone or in conjunction with Geofence Autopunch (see Geofence-Autopunch), Timesheet Mobile can now auto-populate the actual time difference between punch out and punch in between geofences. It will also show the "best route" mileage for their travel punches and flag if the actual travel time took longer than expected. At this time the travel time does not account for traffic at the time of the actual travel and includes a fixed threshold value to flag excessive travel times.
Settings
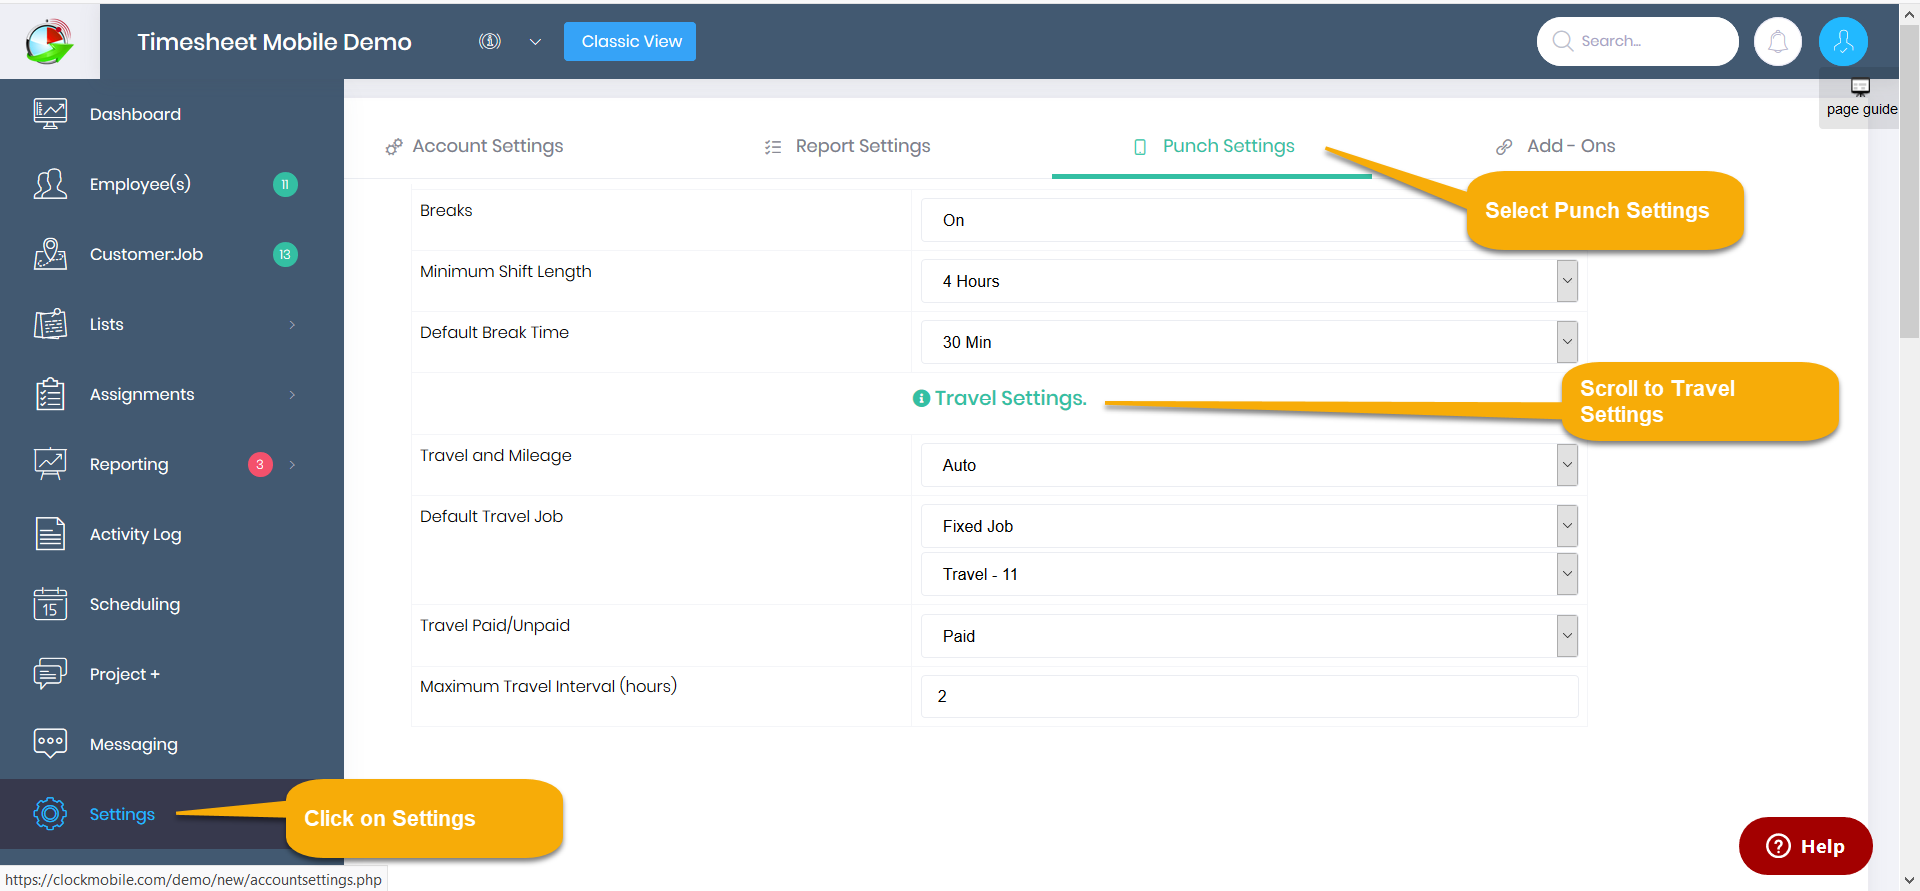
Goto Settings>Punch settings>>Basic settings section to Manage Automated Travel & Mileage. Here is a summary of the settings available:
- Travel and Mileage.
- Select "Off" to disable Travel and Mileage.
- Select "Manual" to allow mobile employees to manually enter the mileage when punching in/out using the smartphone app.
- Select "Auto" to automatically add travel times when employees punch out of one geofence and punch into another some distance away. Note: travel times are not inserted for employees returning to the same geofence.
- Default Travel Job. Choose which job travel is assigned to:
- Fixed job (A selector will let you choose which job).
- Previous Job (Job employee is leaving).
- Next Job (Job employee punches into next).
- Travel Paid/Unpaid. Choose whether to include travel times in employee timesheets.
- Maximum Travel Interval (hours). Set maximum time difference between punch out and punch in for which travel shifts are automatically inserted. Set this value to prevent travel being inserted between workdays or between shifts greater than this interval.
Viewing Travel Logs in Timesheets
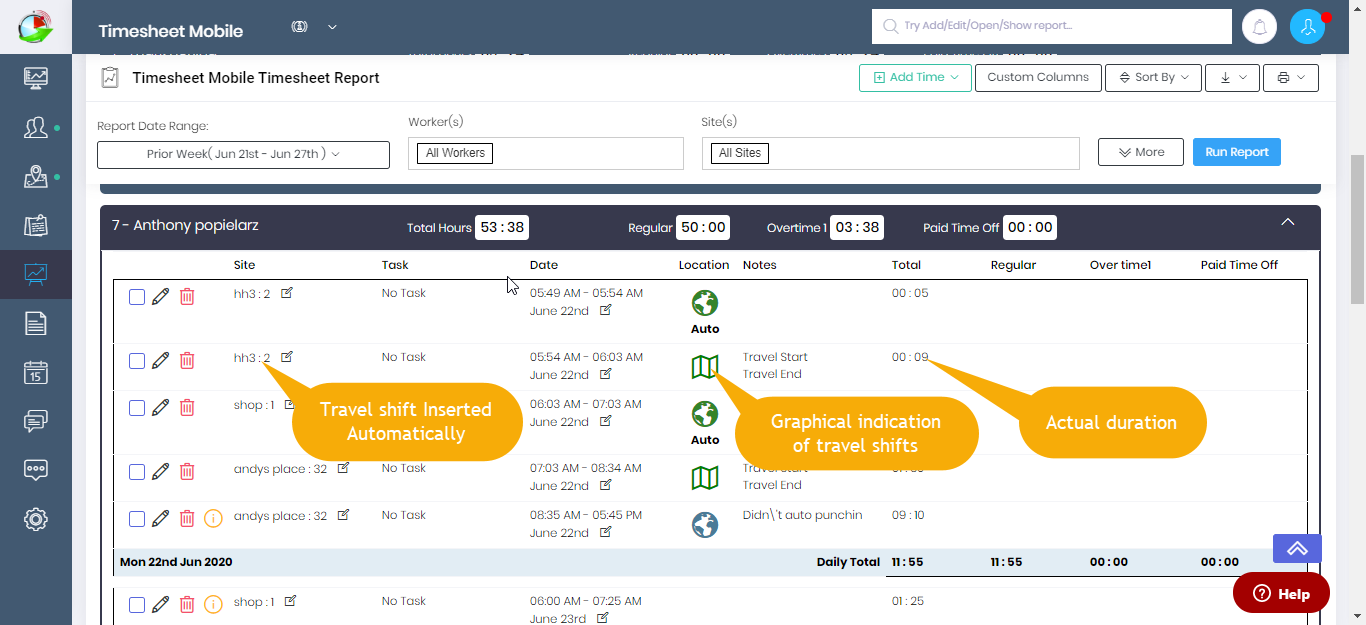
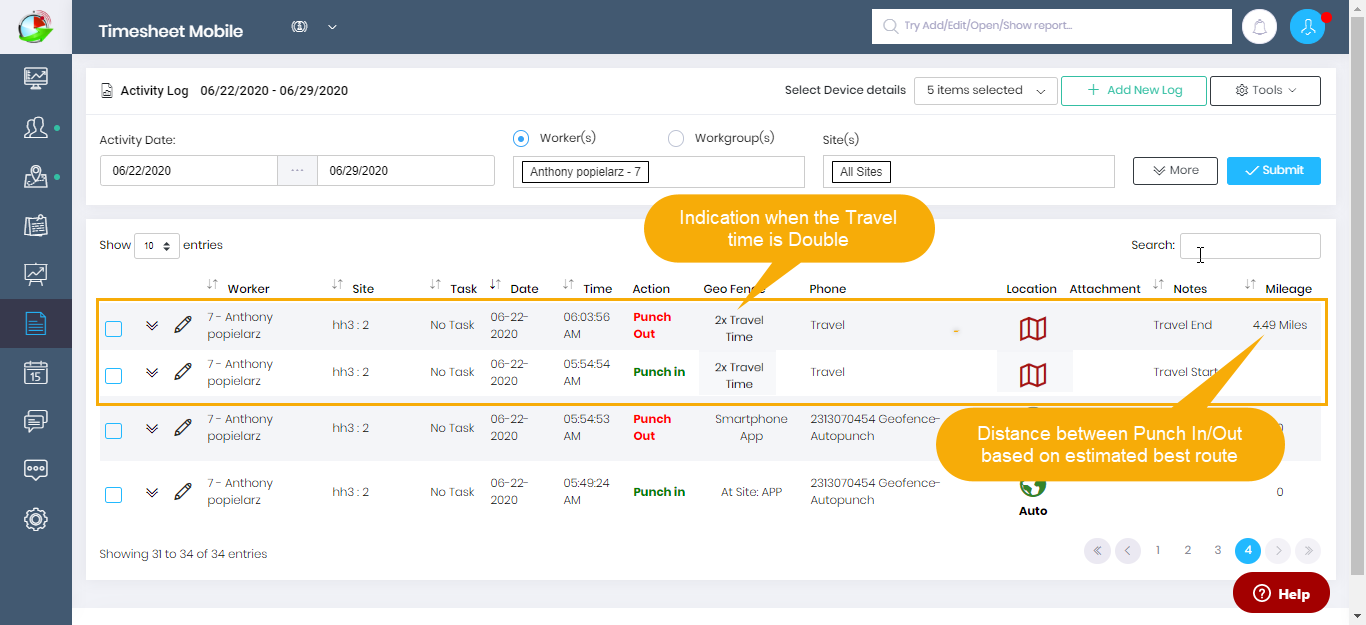
Logs automatically inserted for travel can be viewed directly in the Activity Log or Timesheet Report. Travel logs will be inserted automatically when the worker punches into the next job as long as the travel interval does not exceed the Maximum Travel Interval in settings (see above). See the example below for worker Anthony traveling between two geofence job sites with PreviousJob selected as the option for the travel time.
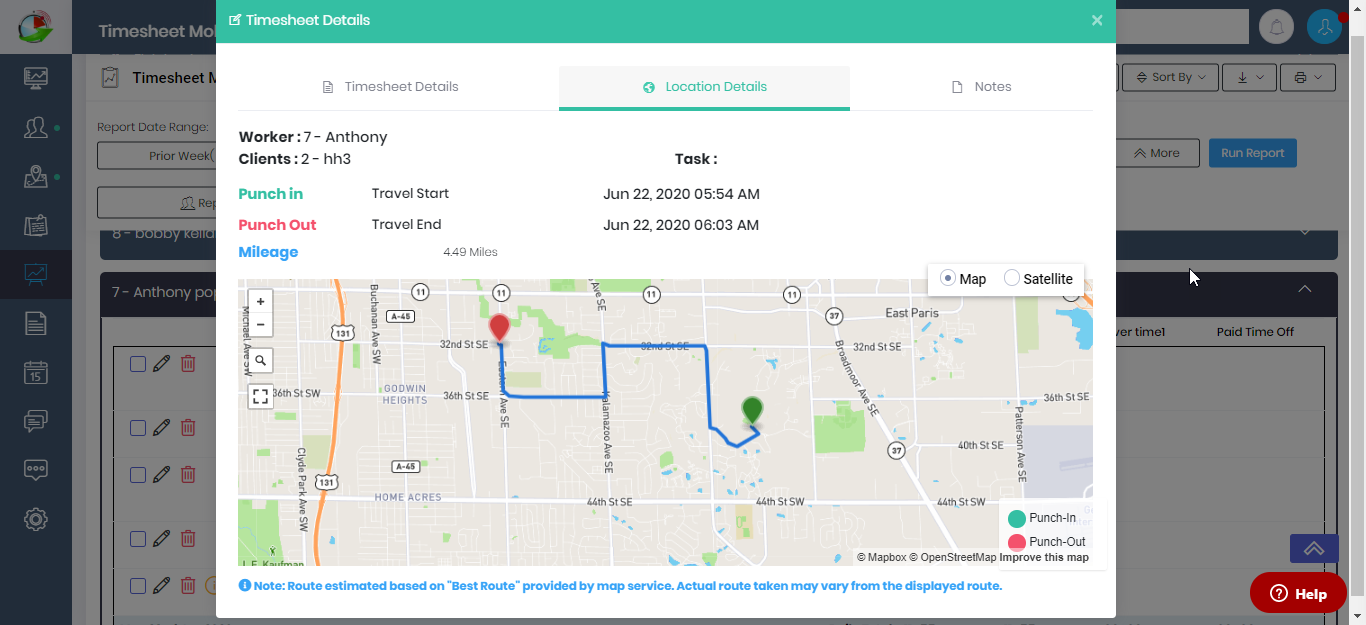
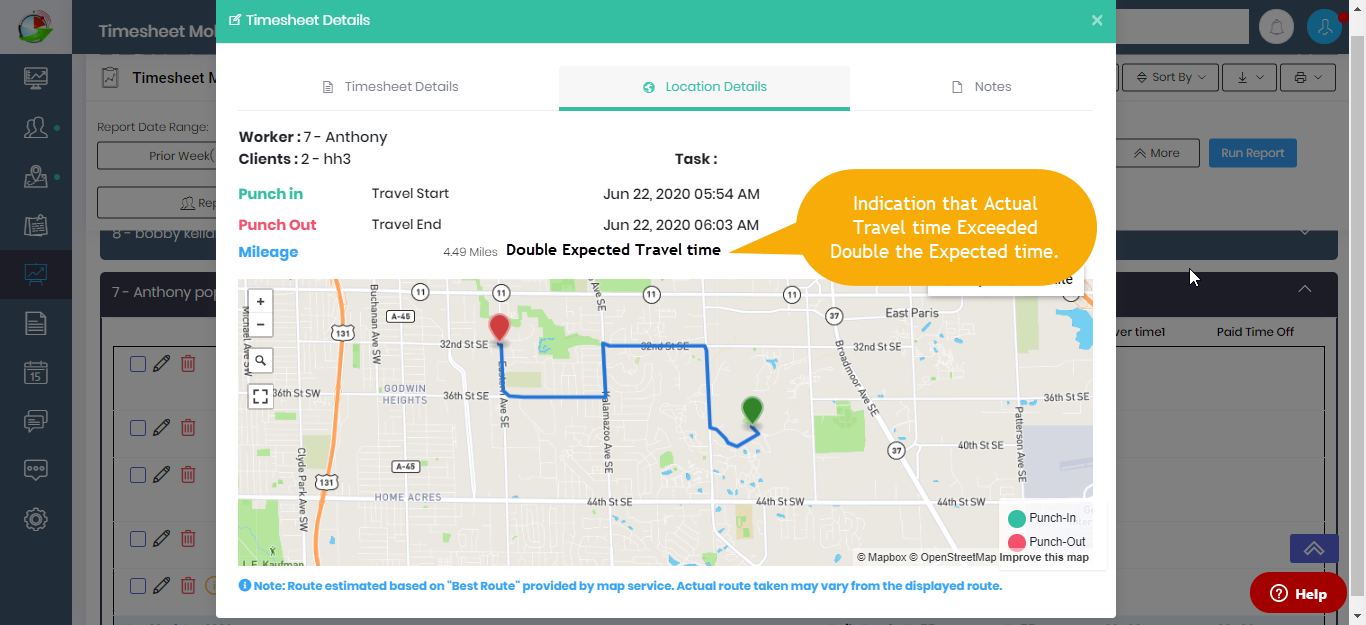
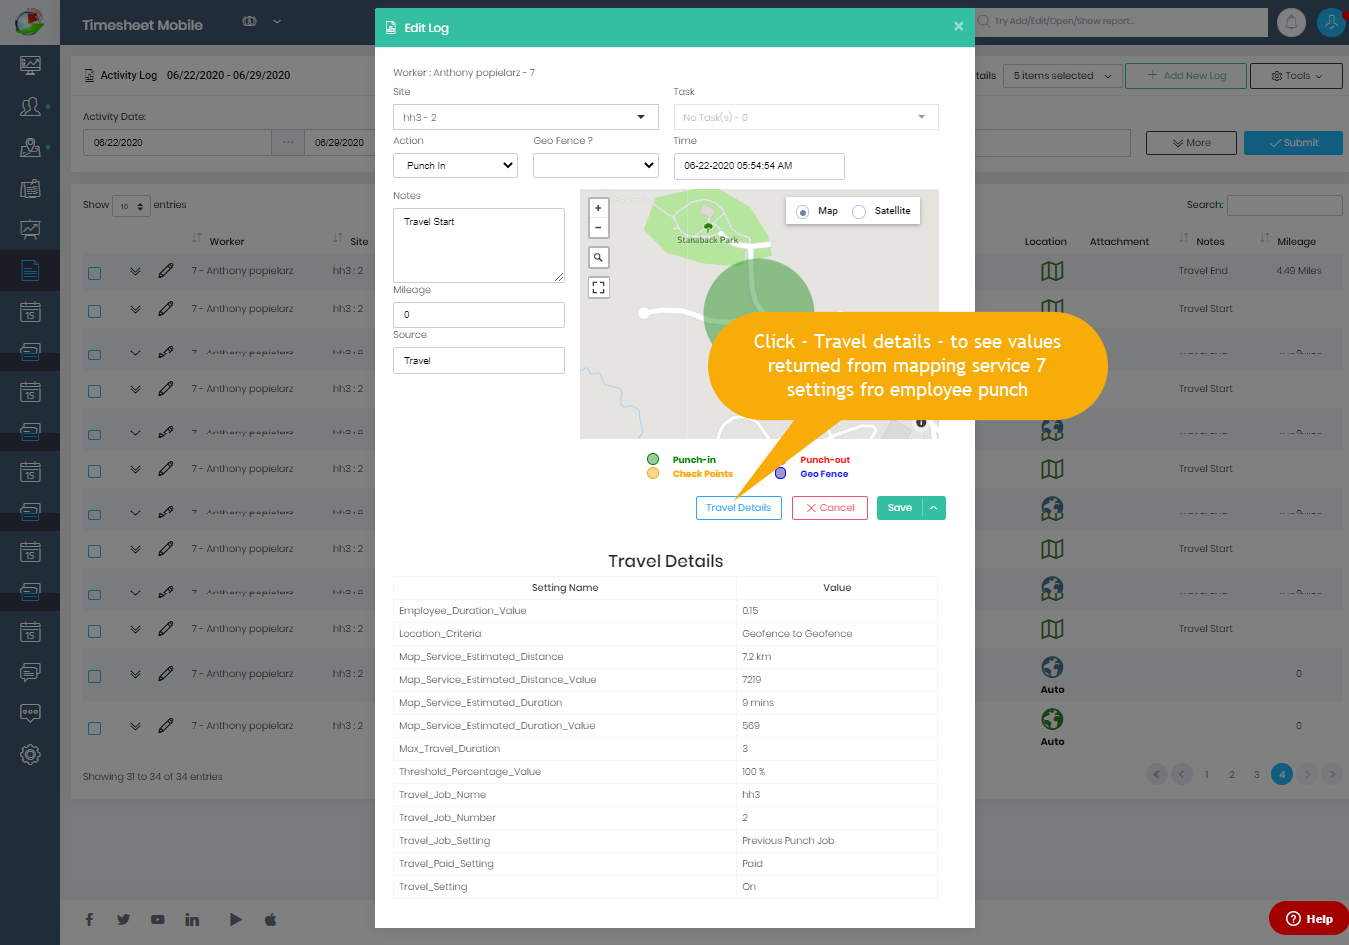
Additional details can be viewed by clicking the travel map icon or editing the shift by double-clicking or clicking the pencil icon. In this view, you can see the actual start/stop time for the travel shift, view the calculated "best route" on the map, and view whether the time exceeded the fixed threshold (double the amount of time expected). Keep in mind the calculated time does not factor in traffic at this time when determining whether excessive travel time shifts need adjusting.
If the travel time graphical indication is RED it indicates that the time between punch out from the last site and punch into the next site took twice the travel time estimated by the mapping service. Travel time does not presently factor in traffic so these logs are highlighted for further review by an administrator or manager.
Viewing Travel Logs in Activity Log
Logs inserted automatically for travel can be also be viewed in the Activity Log. This view provides details for the individual punch in and punch out created automatically when the Travel Time feature is enabled.
Double-clicking a log will show additional details as shown below.
The day has come where you can set up which sites employees should be working, set up how travel time is allocated & pretty much all your workers will need to do is show up at the site. Of course, we still suggest you monitor their times regularly in case of unforeseen events. Timesheet Mobile customer support can help answer any questions and help you get set up for automated travel times.
Comments
0 comments
Article is closed for comments.